It’s easier than ever to export realtime PostHog data to satisfy the Airtable fanatics in your life.
Requirements
Using this requires either PostHog Cloud with the data pipelines add-on, or a self-hosted PostHog instance running a recent version of the Docker image.
Configuring Airtable
With data pipelines enabled, let’s get Airtable connected.
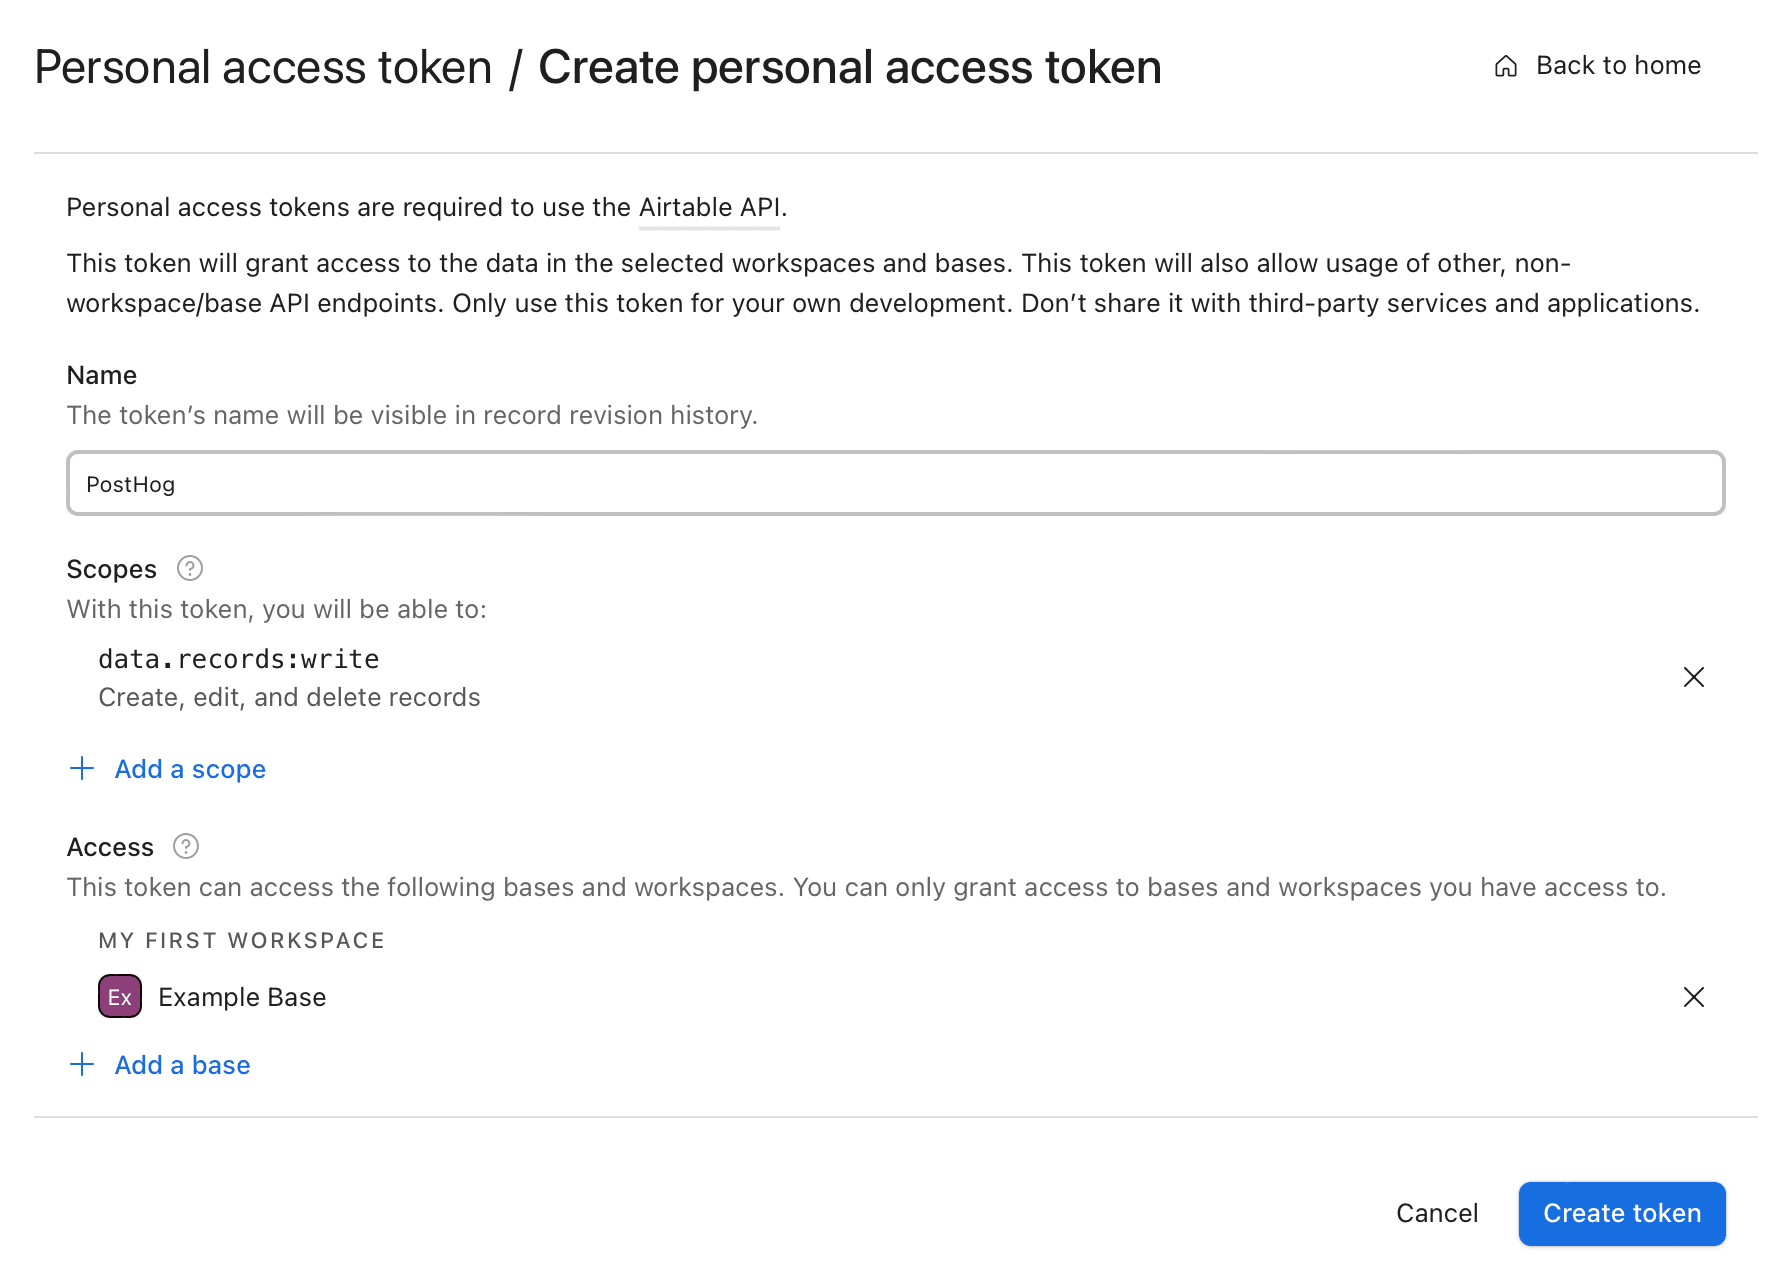
First, create a personal access token in your Airtable account. You’ll need to add the data.records:write scope so that PostHog can create new records.
Then add the base you want to create new records in.

Next, you’ll want to visit Airtable’s API reference to get your base ID, table name, and field names.
Configuring PostHog’s Airtable destination
You should have these details now:
- Access token
- Base ID
- Table name
- Field names
With them, we’re ready to set up the Airtable destination.
- In PostHog, click the "Data pipeline" tab in the left sidebar.
- Click the Destinations tab.
- Click New destination and choose Airtable's Create button.
Now we can plug in the above values.

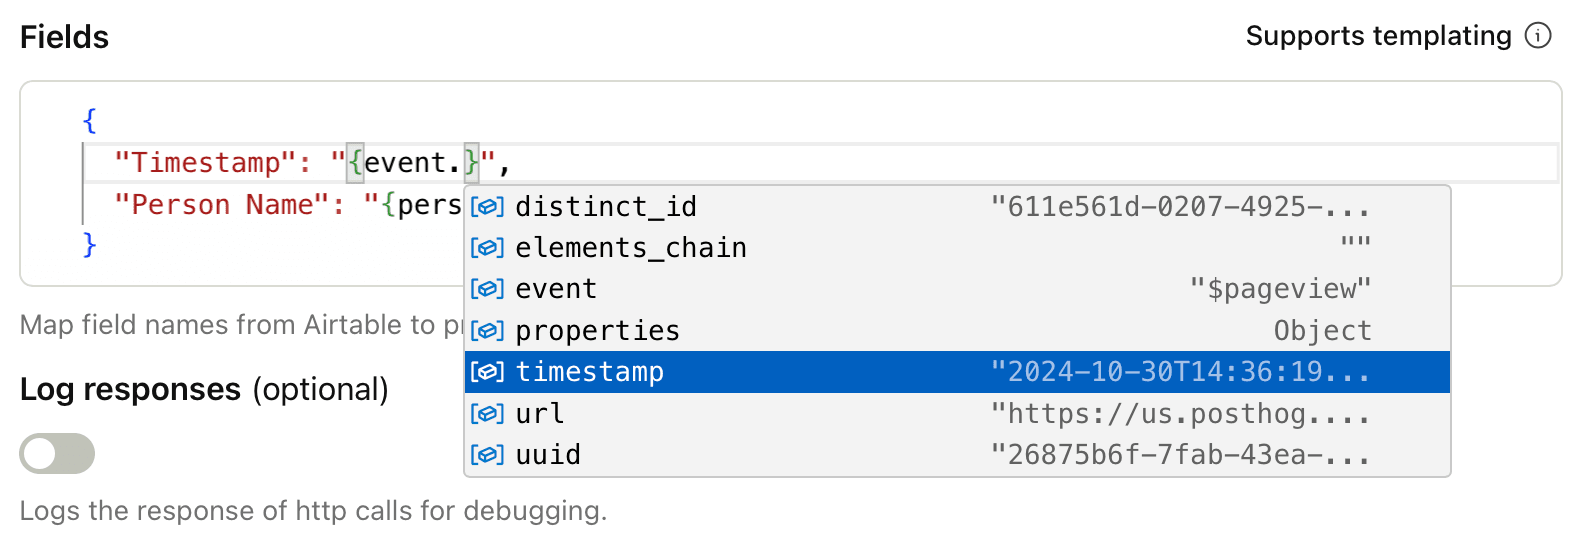
The Fields editor enables you to map whatever PostHog values you like to columns in your Airtable base. The keys on the left should match the names you’ve already set for columns in Airtable. Values on the right can be any property on a person or event instance.
Filtering
In its experimental state, the Airtable destination will not batch its output to your base. If you trigger on events that happen more than five times per second, you’ll hit the Airtable API rate limit.
So be selective about the events you forward to Airtable. Instead of every pageview, for example, just send the high-impact events like conversions. Use the Filters panel to set this up.
Testing
Once you’ve configured your Airtable destination, click Start testing to verify everything works the way you want. Switch off Mock out async functions in order to send a test event to Airtable and see a new record.
A note on data types
Where possible, Airtable will convert values into native datatypes set in your columns. So, if you pass event.timestamp to an Airtable Date column, that will work just fine.
| Option | Description |
|---|---|
Airtable access tokenType: string Required: True | Create this at https://airtable.com/create/tokens |
Airtable base IDType: string Required: True | Find this at https://airtable.com/developers/web/api/introduction |
Table nameType: string Required: True | |
FieldsType: json Required: True | Map field names from Airtable to properties from events and person records. |
Log responsesType: boolean Required: False | Logs the response of http calls for debugging. |
FAQ
Is the source code for this destination available?
PostHog is open-source and so are all the destination on the platform. The source code is available on GitHub.
Who maintains this?
This is maintained by PostHog. If you have issues with it not functioning as intended, please let us know!
What if I have feedback on this destination?
We love feature requests and feedback. Please tell us what you think.
What if my question isn't answered above?
We love answering questions. Ask us anything via our community forum.